.png)
Vehicle release documents are essential for security. Only the carrier who has your vehicle release is authorized to pick up your vehicle. With Auto Hauler Exchange, our built-in security system ensures that your documents are only accessible to the vetted carrier who books your load.
To help you avoid hiccups, here’s everything you need to know about what release documents are, when they’re required, and how to make sure they’re correctly uploaded to the Auto Hauler Exchange platform.
What Is a Vehicle Release Document?
A vehicle release document is typically required when a vehicle is being picked up from a location such as:
- An auction house (e.g., Manheim, ADESA)
- A port or rail yard
- A storage facility
- A dealership
- A vehicle manufacturer or OEM lot
It gives a carrier legal permission to pick up the vehicle on your behalf, keeping your vehicle and its transportation secure.
Common Documents Types
- Gate Pass
- Vehicle Release
- Authorization Report
- Auction Pickup Sheet
- Bill of Lading from the origin
Note on Vehicle Release Types
If your vehicle was purchased through an online third-party auction (OpenLane, SmartAuction, etc.), be sure to provide all necessary documents and sufficient notes to the carrier depending on the pick-up location’s requirements.
For example, if your vehicle is stored at a Manheim facility, they will require in nearly all cases a Manheim barcoded gate pass. This means that an invoice or bill of sale will not be sufficient for pick-up. Be sure to confirm pick-up procedures as much as possible before uploading to AHX.
Why It Matters
If the correct vehicle release document isn’t available or correctly uploaded:
- Carriers can’t pick up the vehicle.
- The vehicle may incur storage fees.
- Your load may be canceled or delayed, which affects your delivery timelines and reputation.
How to Attach Release Documents When Uploading Your Vehicle(s)
Uploading documents is easy and ensures your carrier has instant access to everything they need.
Step 1:
Log in to your AHX Shipper Dashboard.
Step 2:
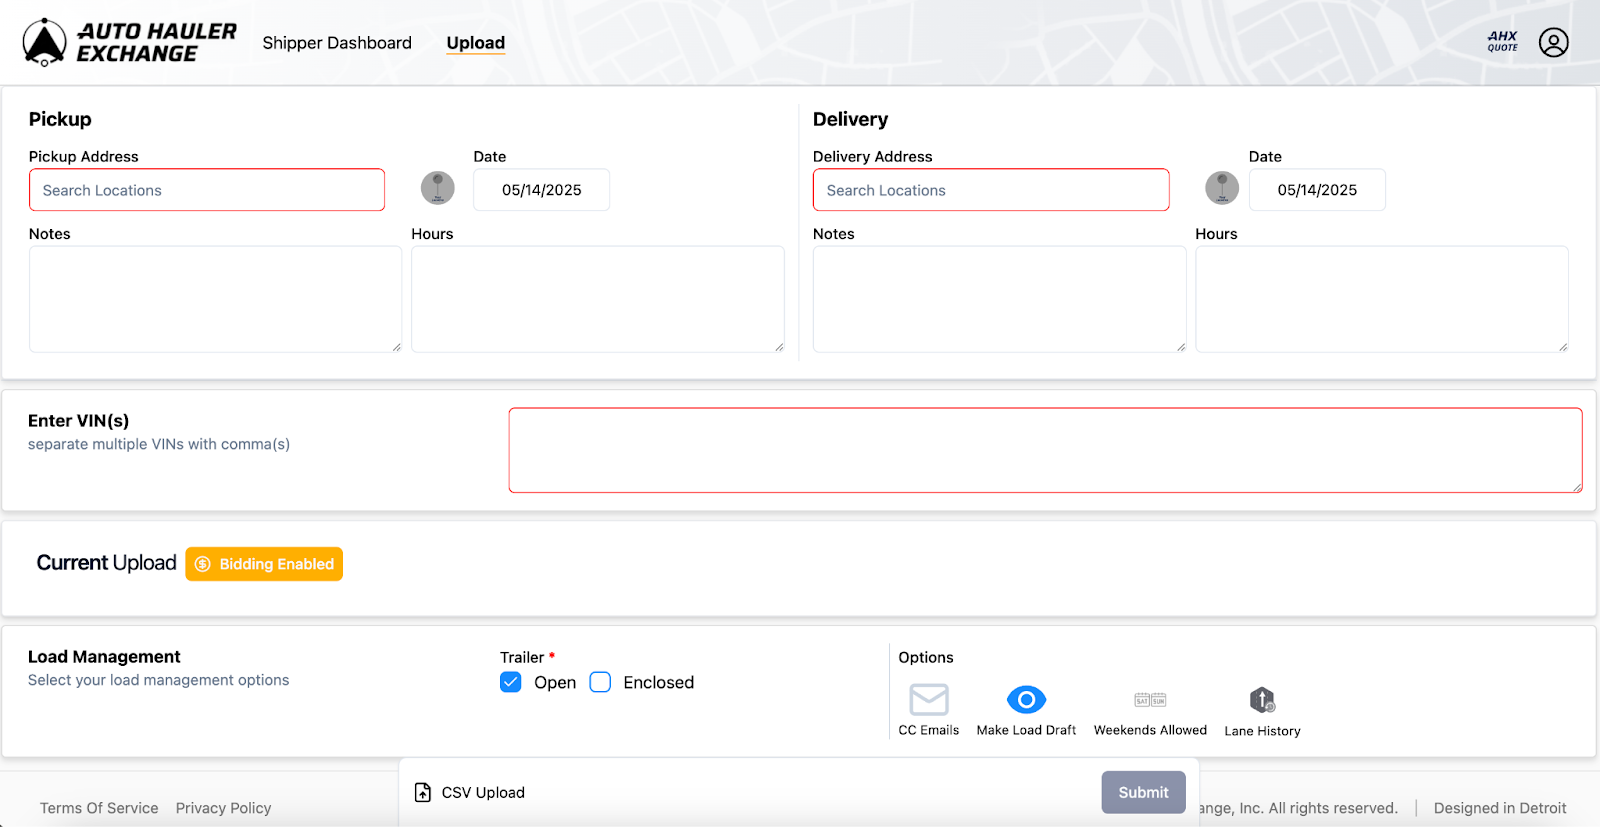
Enter the necessary information regarding your vehicle including:
- Pickup & delivery addresses
- Pickup & delivery dates
- Location Notes, Hours, and Contact Info
- VIN(s)
- Vehicle Operability
- Trailer Type (Open/Enclosed)
For more information on uploading a vehicle, view our step-by-step guide.
Step 3:
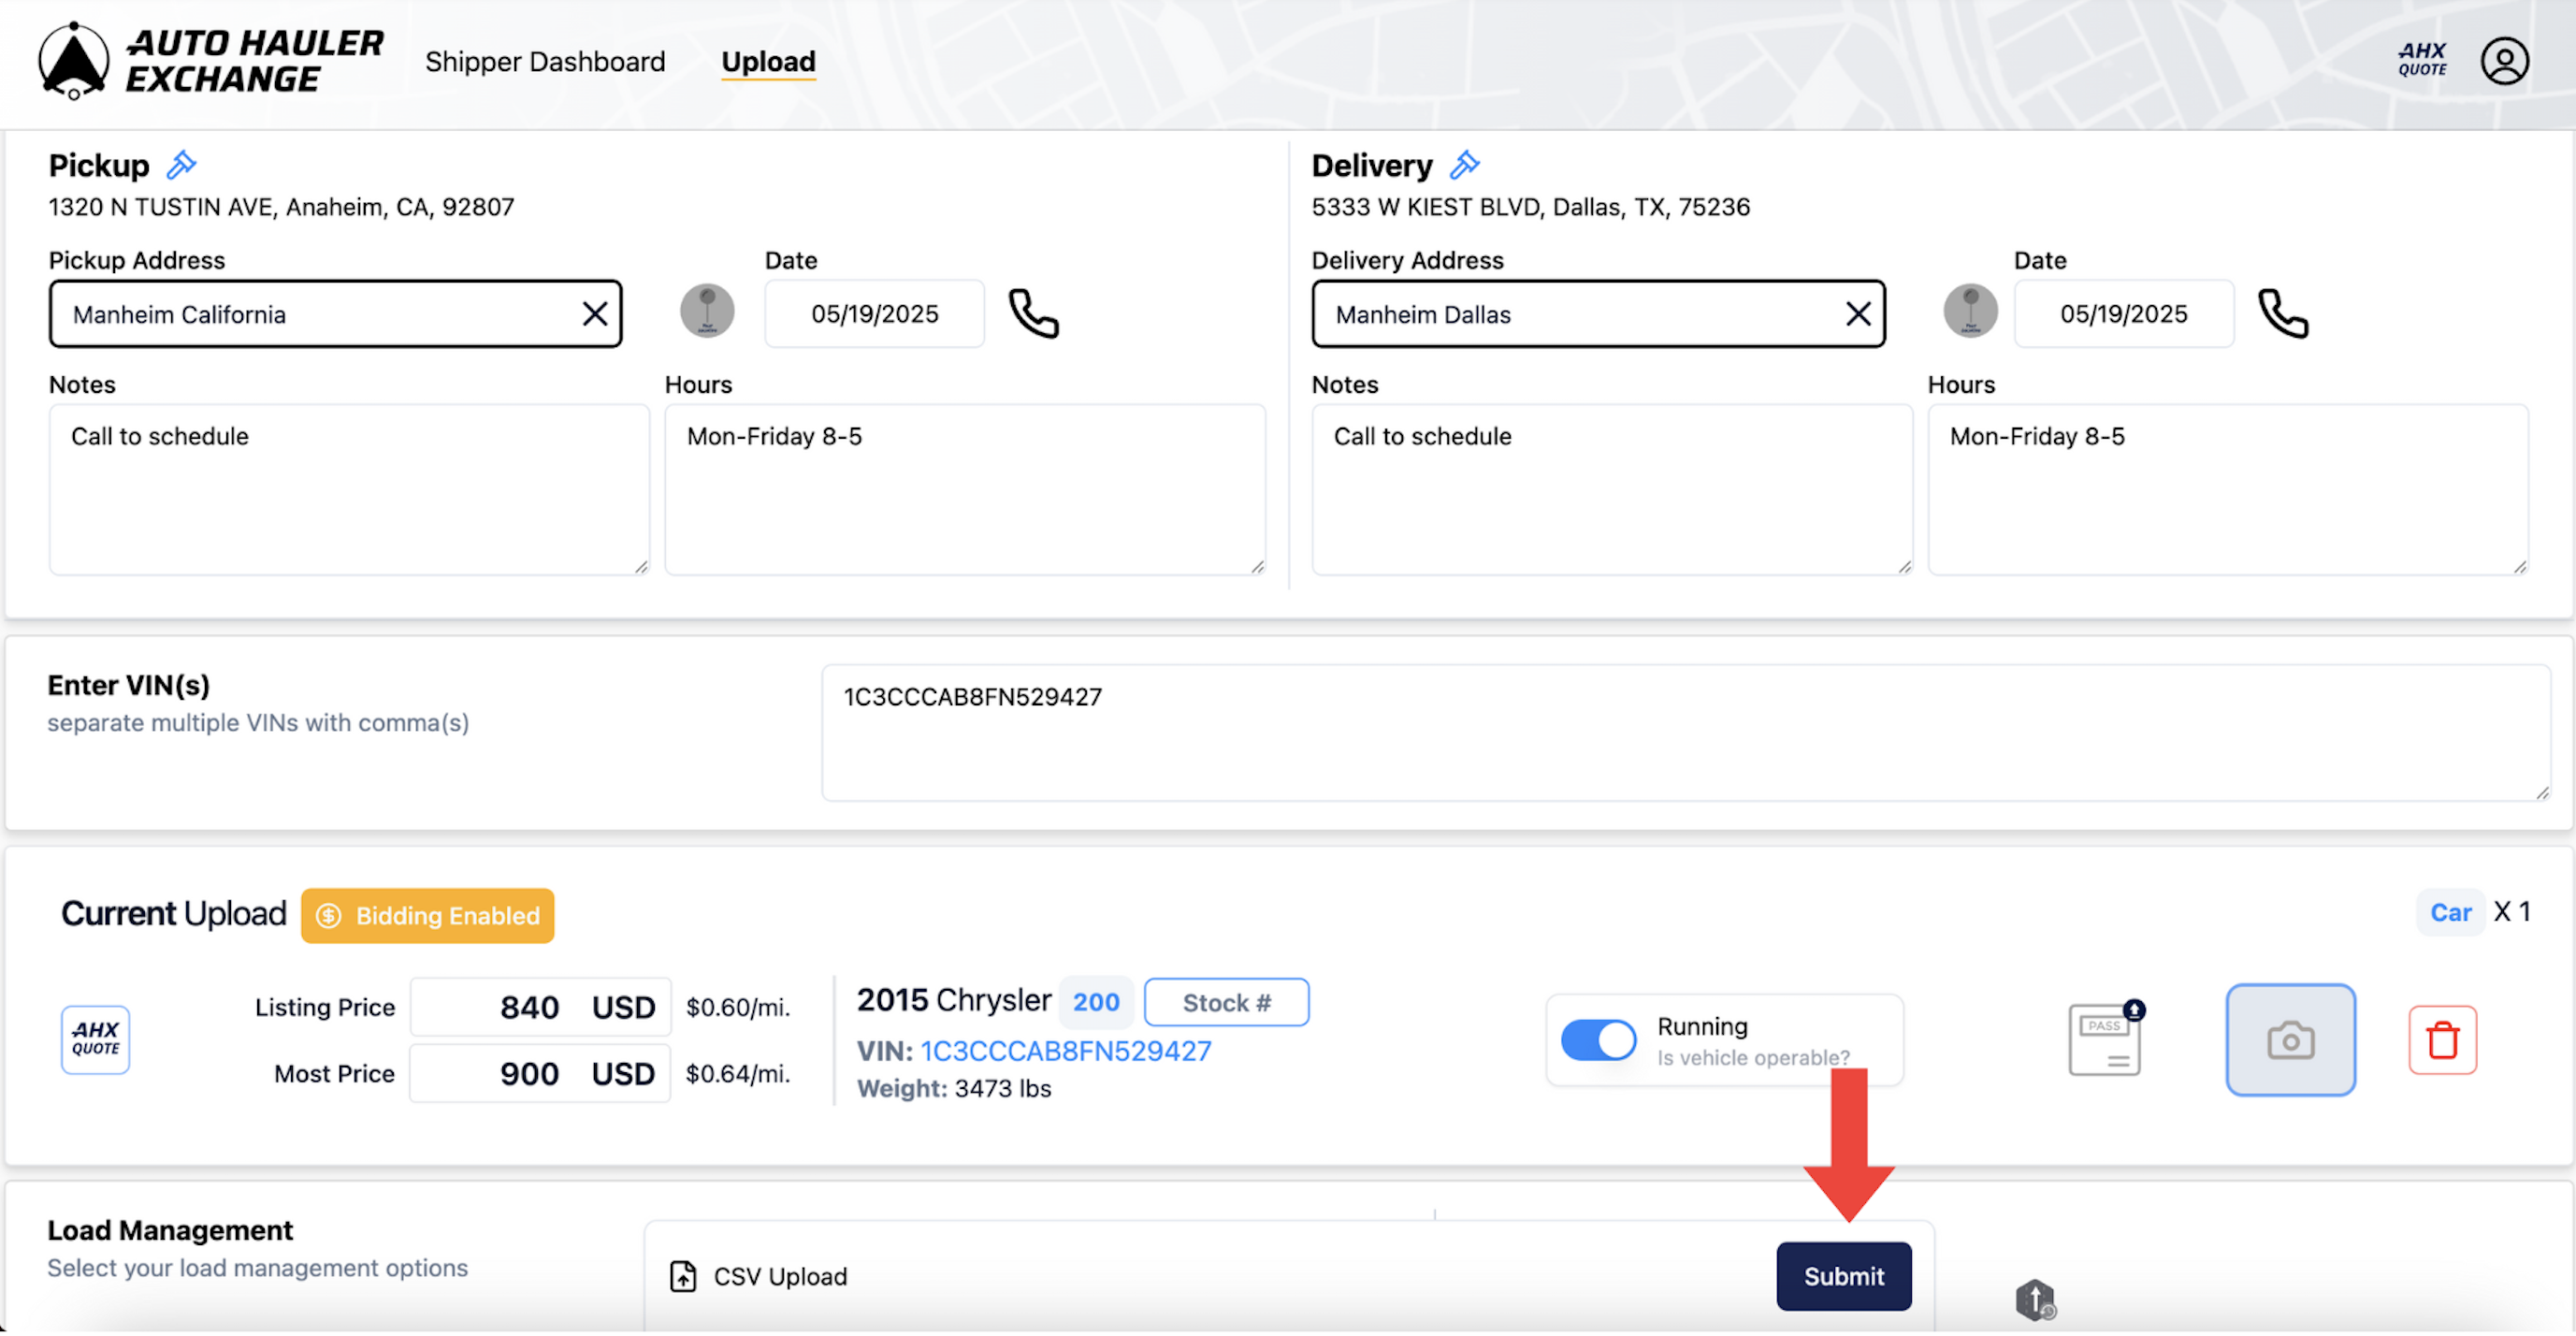
Once the proper information is entered, you will be given the option to upload both pictures and gate release documentation.
The gate release documents can be uploaded by clicking on the pass icon.
Any necessary photos can be uploaded by clicking on the camera icon. Be sure to use the photos section for photos only, not for vehicle releases, as these types of documents are handled differently.
When clicking on either of the icons you will be prompted to select a preexisting file from your device. You can select more than one file at a time.

Step 4:
Click “Submit” and your load will be posted to the dashboard with your documentation stored within the load.
How to Attach Release Documents After You Have Already Uploaded Your Vehicle(s)
Step 1:
Log in to your AHX Shipper Dashboard.
Step 2:
From the shipper dashboard, locate the load you wish to add documents to.
Step 3:
Use the actions menu (the three little dots on the left side of a load) and then navigate to the Add Docs section.
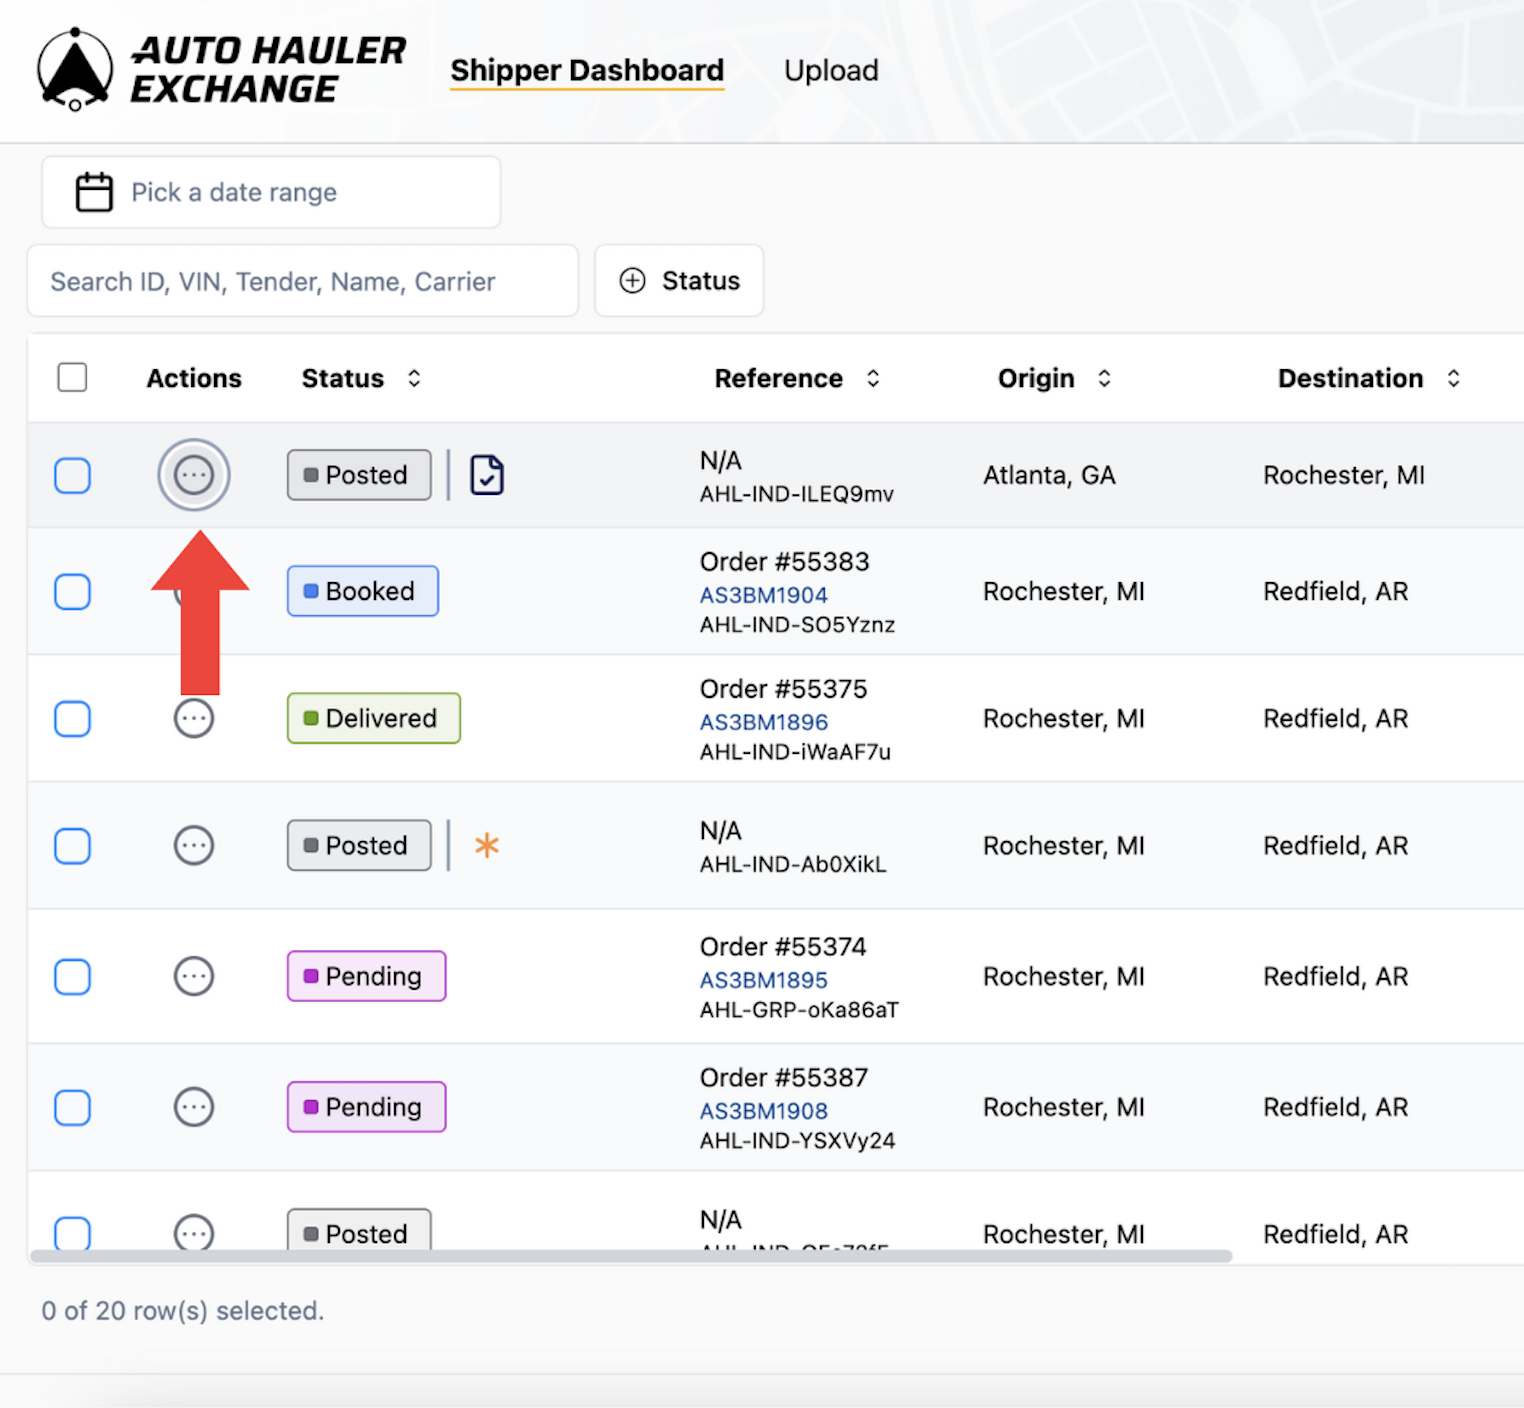

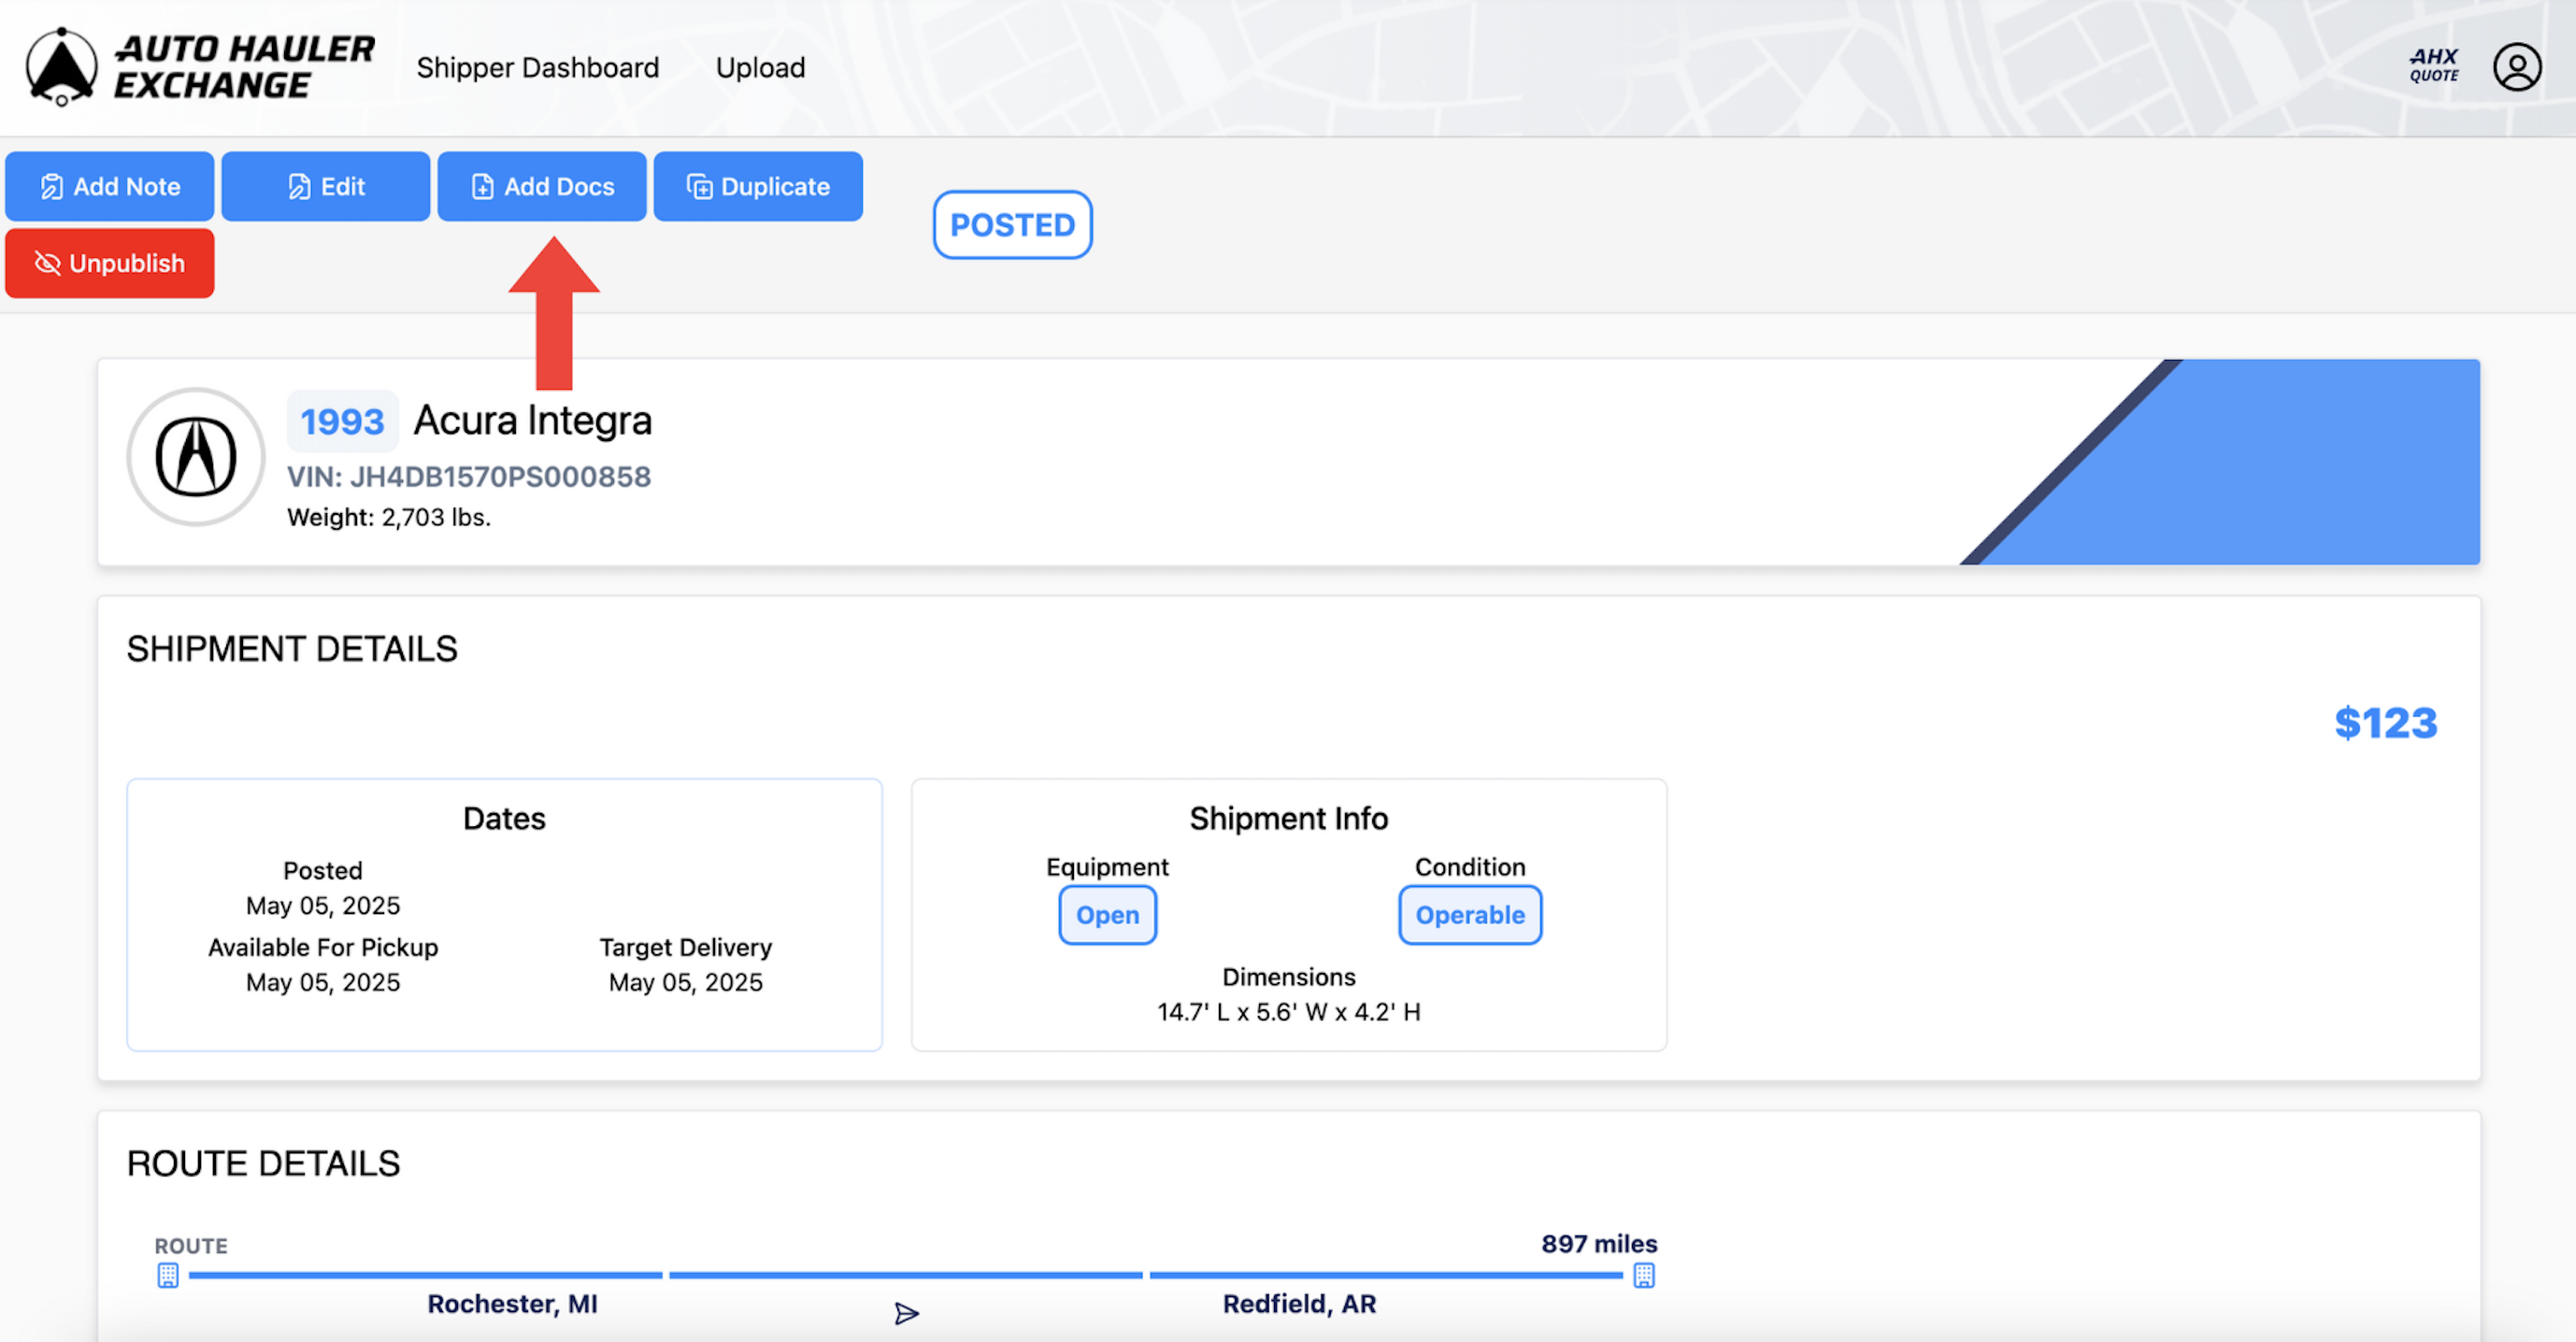
Or, once you are clicked into the load you may select “Add Docs” in the top left corner of the load screen.
Step 4:
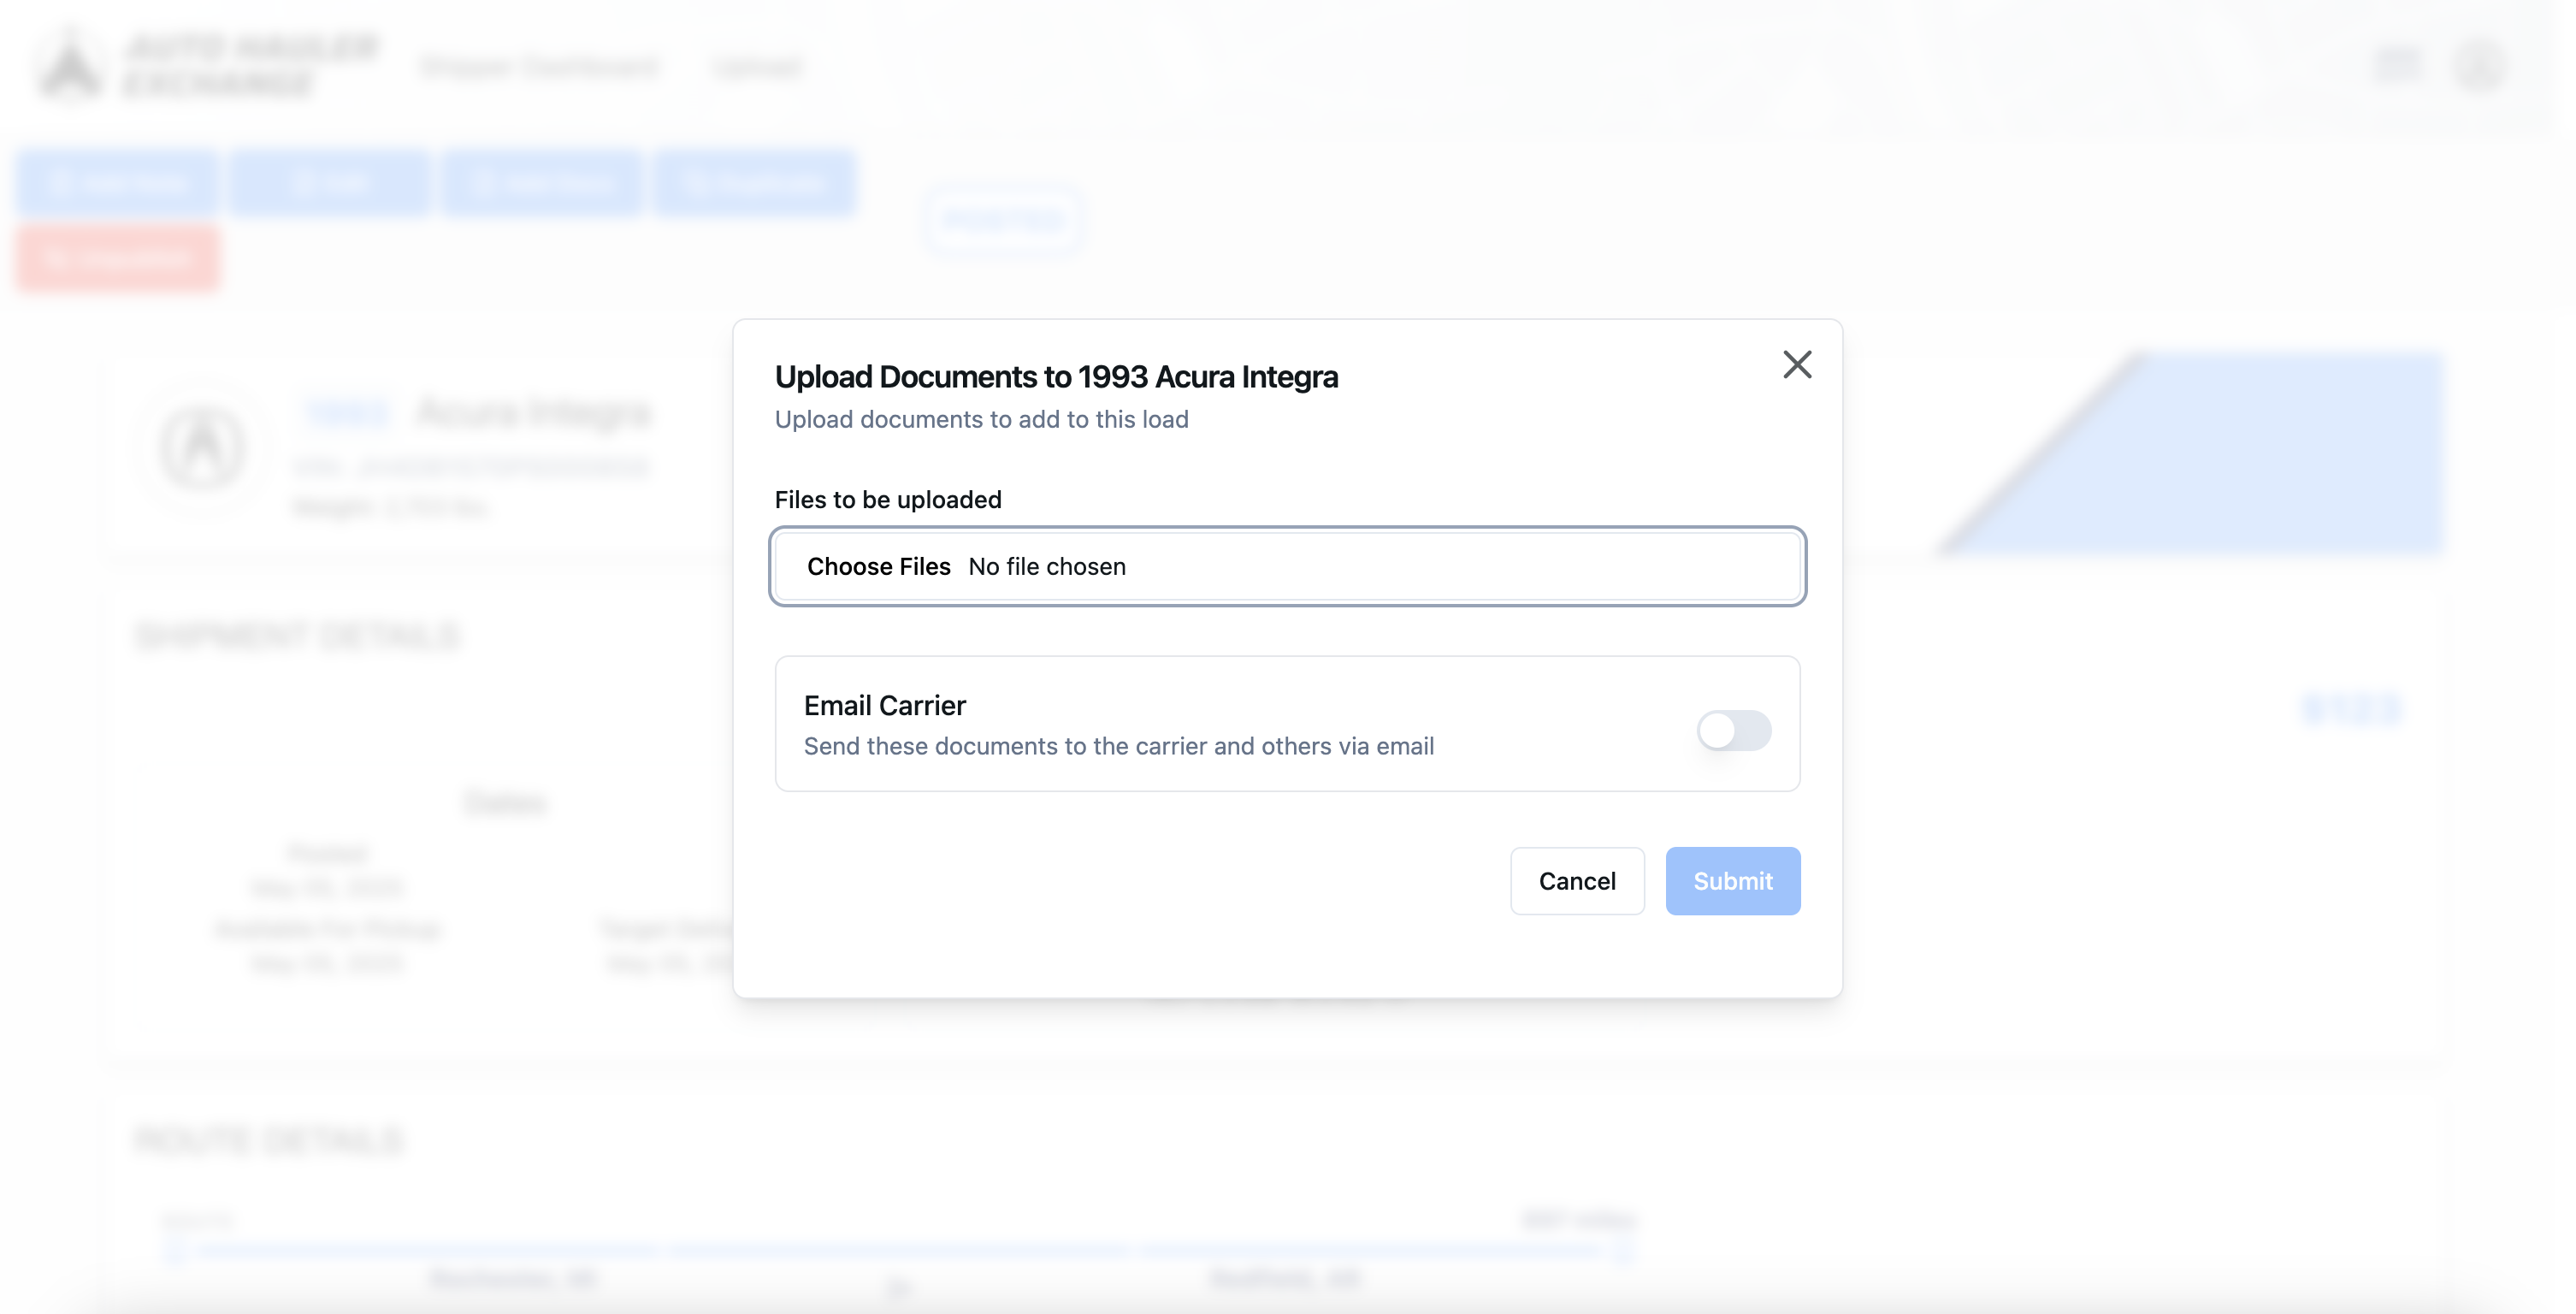
You will then be prompted to choose files to be uploaded to the load.
Also select whether or not you want the documents to be emailed directly to your carrier. We always recommend emailing the carrier if it’s in “Booked” status. If it’s in “Posted” or “Drafts,” no need to email as no carrier is assigned to your load yet.
Once you have added your documents, click submit to add them to your load.
Checking Your Work
Step 1:
When looking at your load on the dashboard, a paper icon with a check mark will appear next to your load. This indicates that your documents have been uploaded and attached to your load correctly.
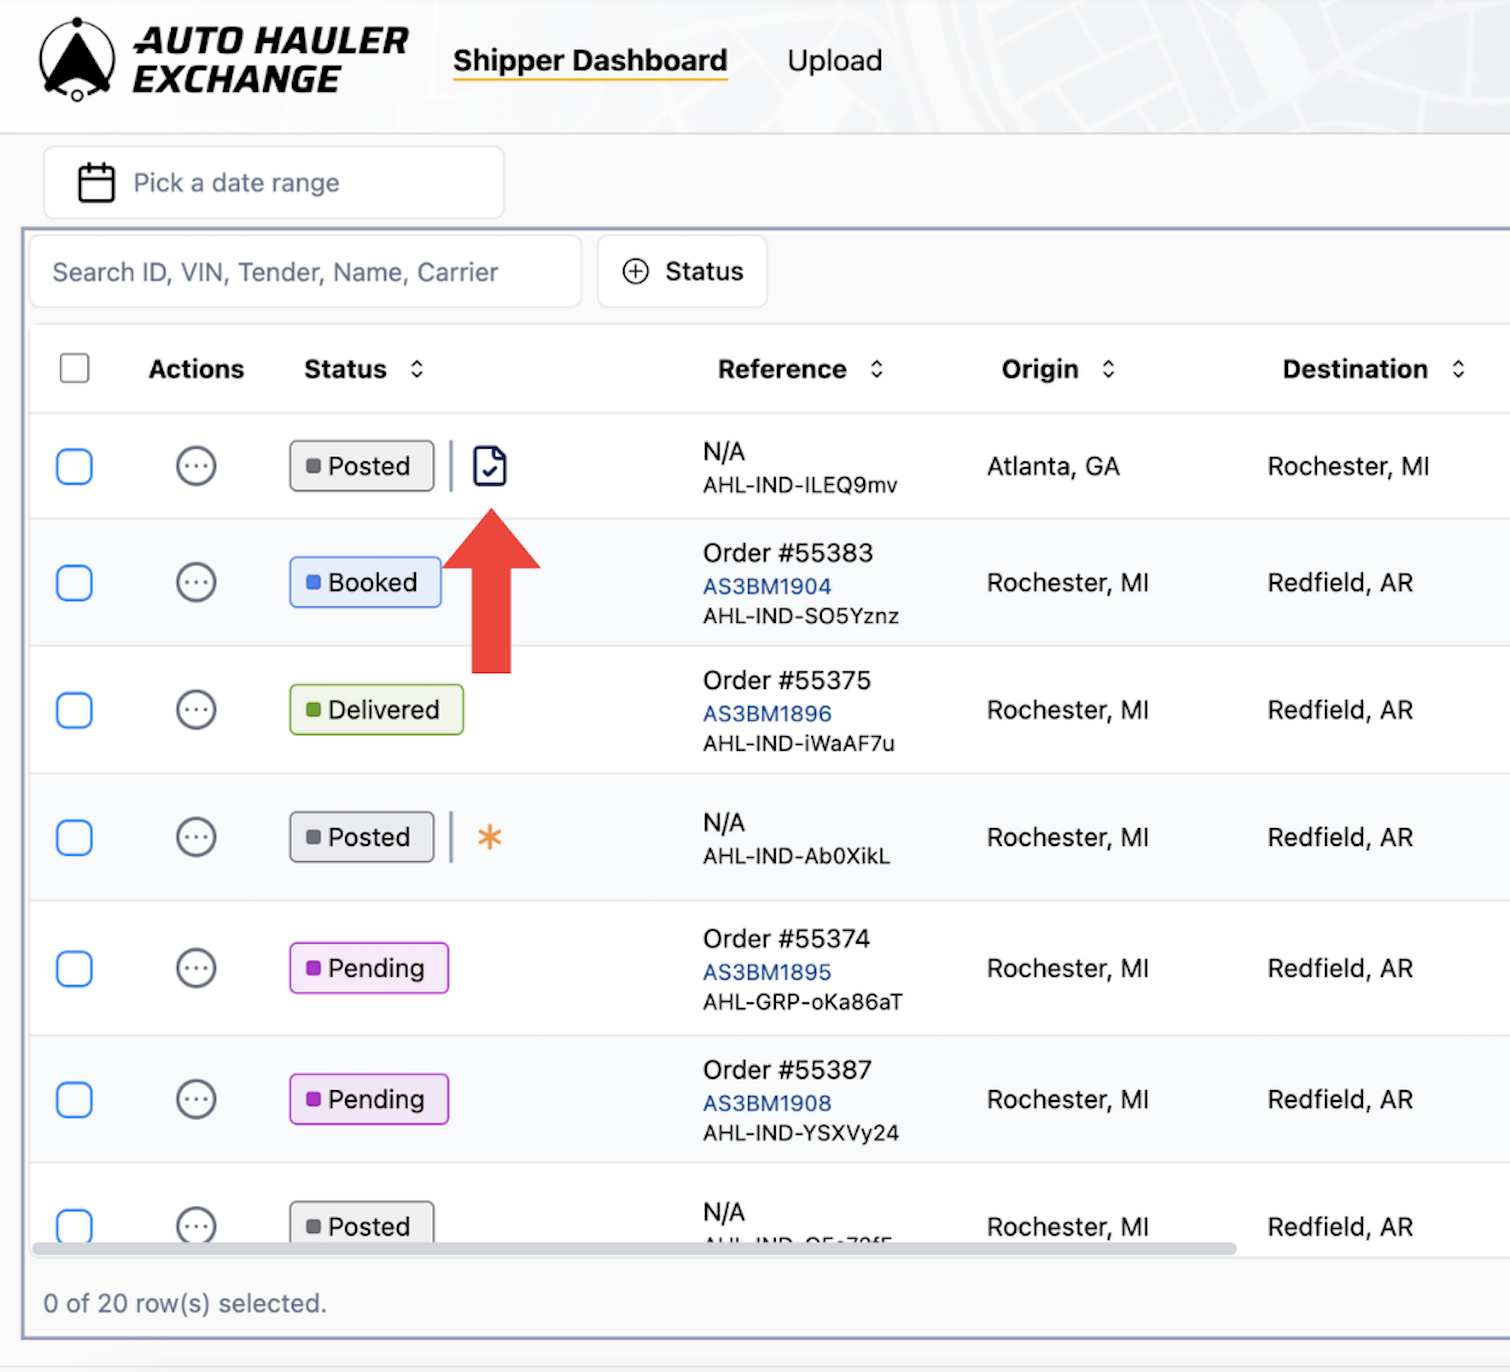
If you hover over the icon, it will tell you how many documents have been uploaded.

Step 2:
Locate the action menu (three little dots) on the left side of the load and then click “View Docs”
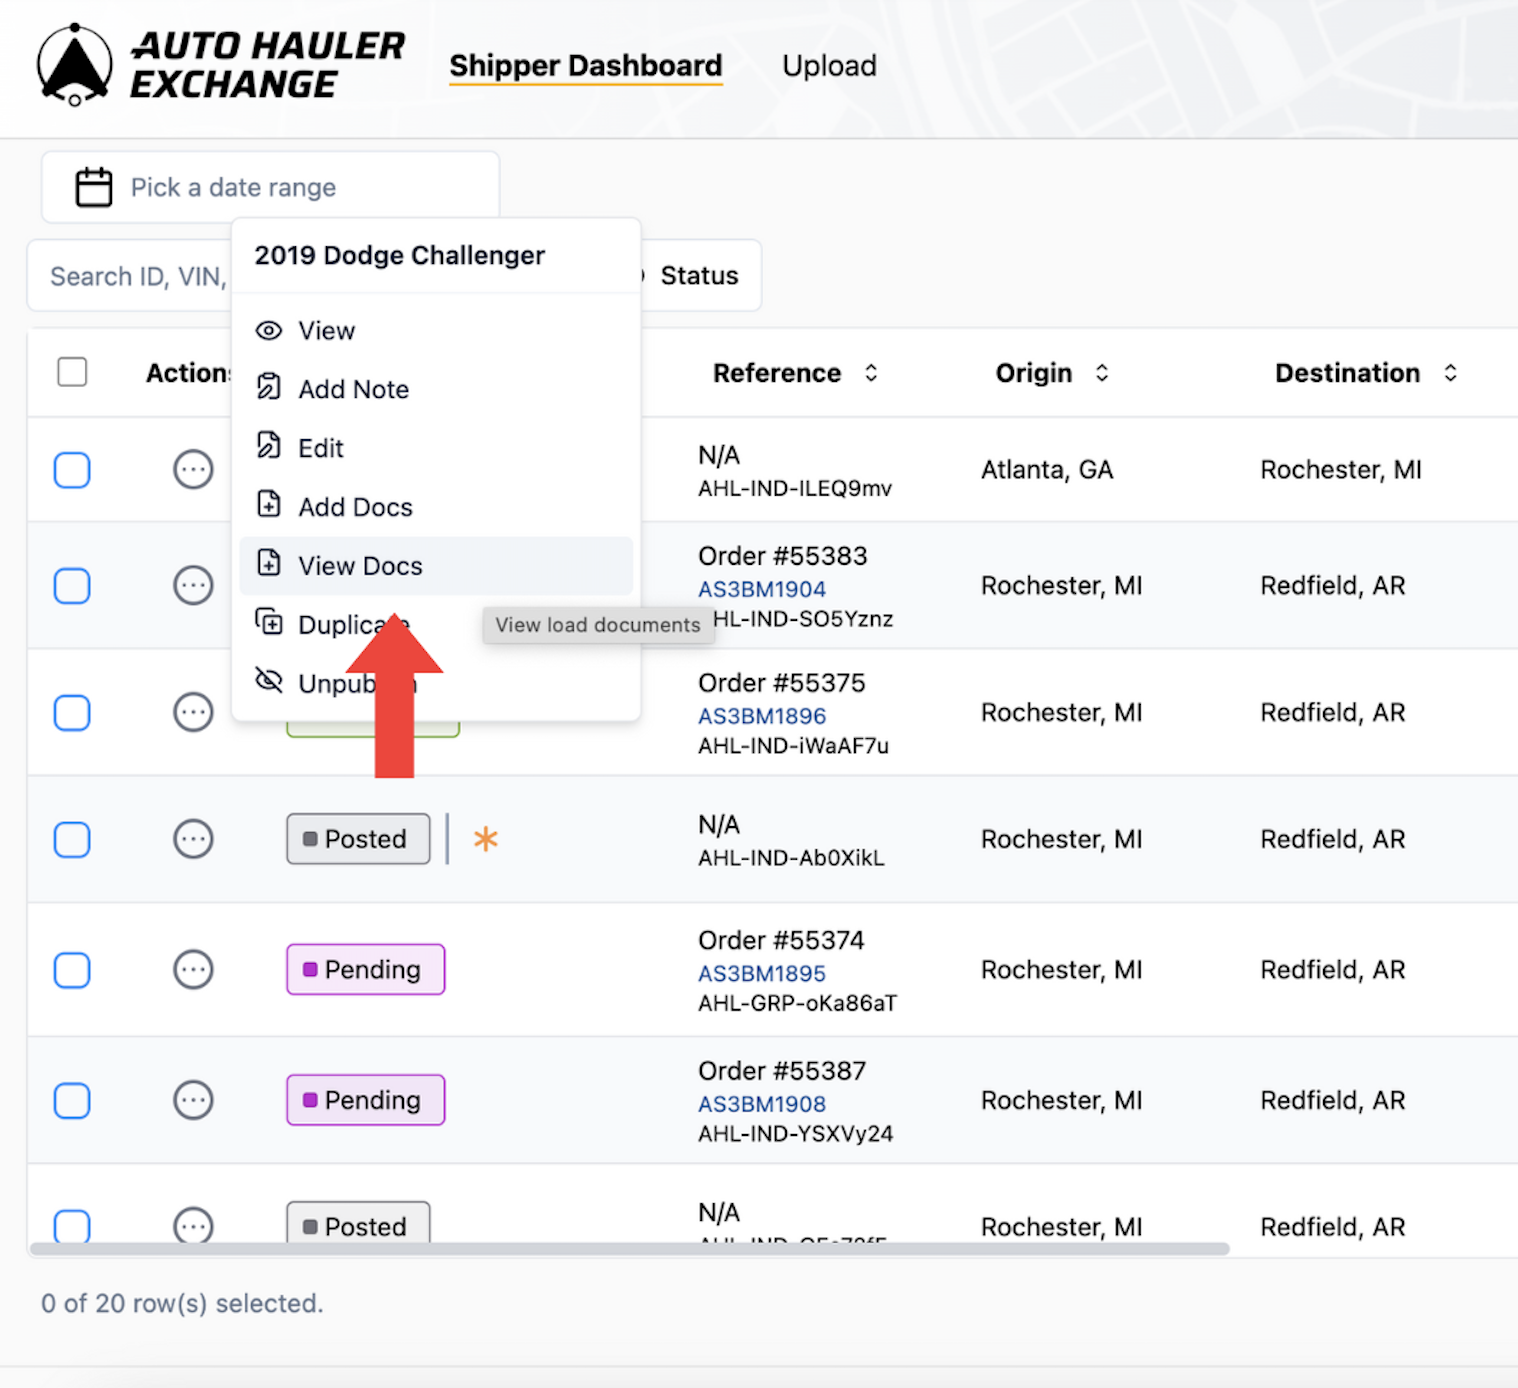
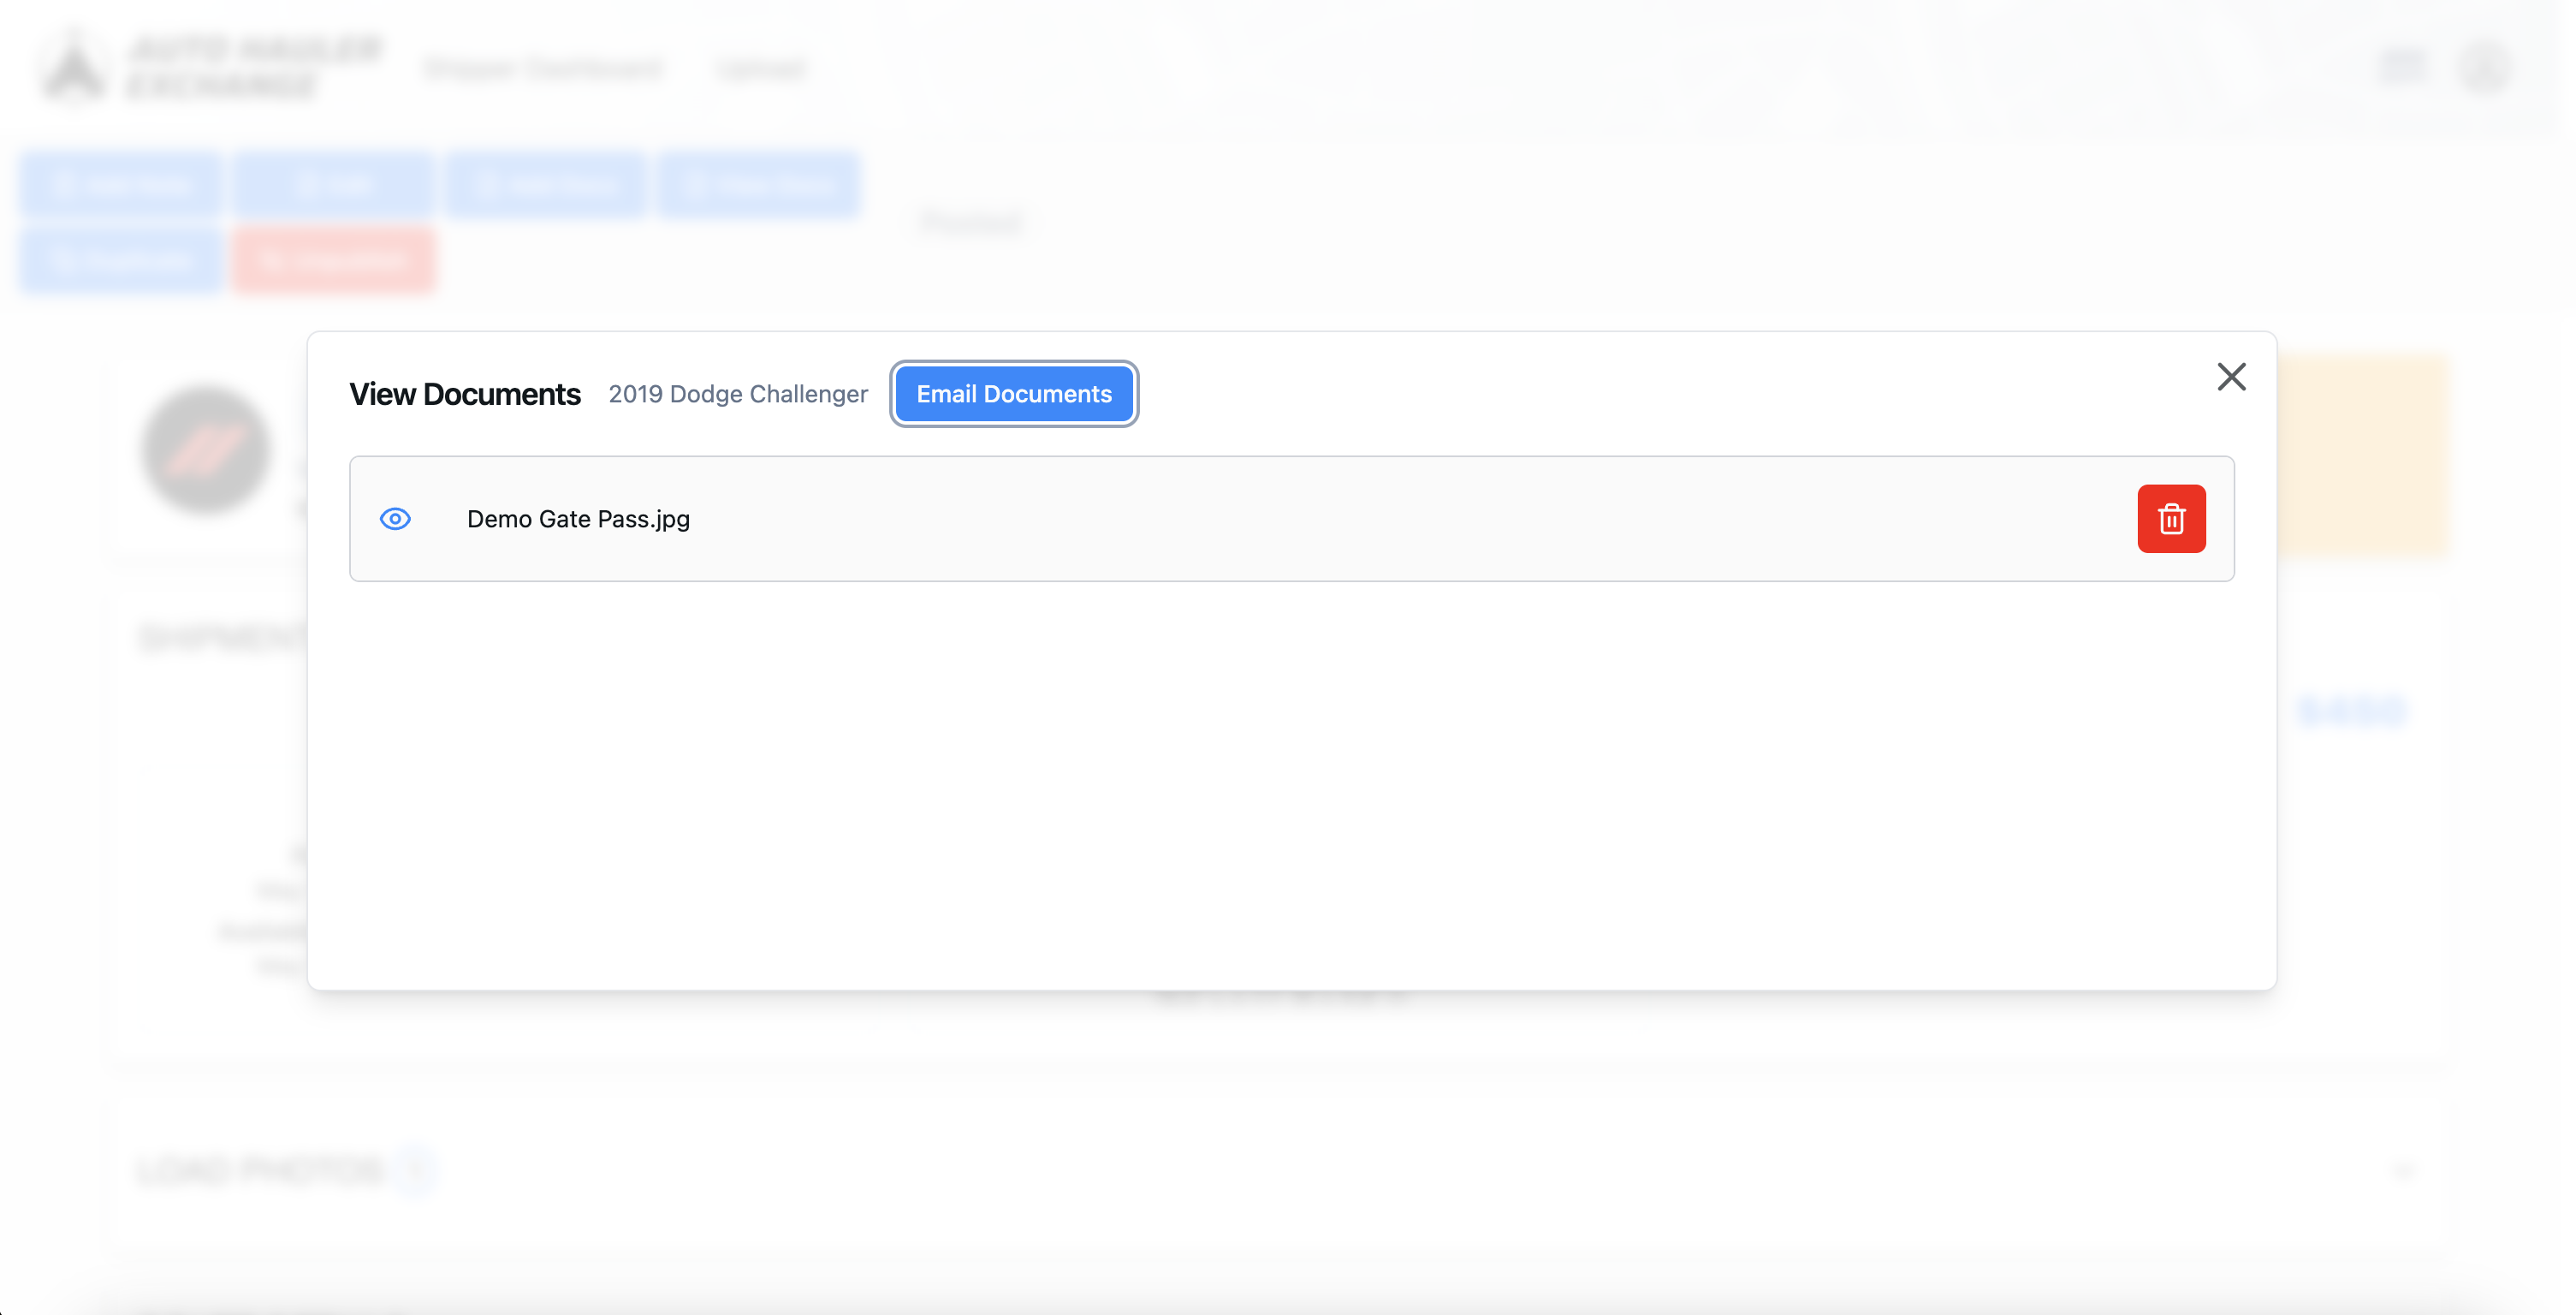
Here you will be able to view each individual document that you have uploaded under that load.
You can also use the “red trash can” icon to delete any documents you wish to get rid of.
Click the “email documents” button to email the documents to your designated carrier.
You may also click on the load you wish to check. In the top left hand corner you will see “View Docs.”
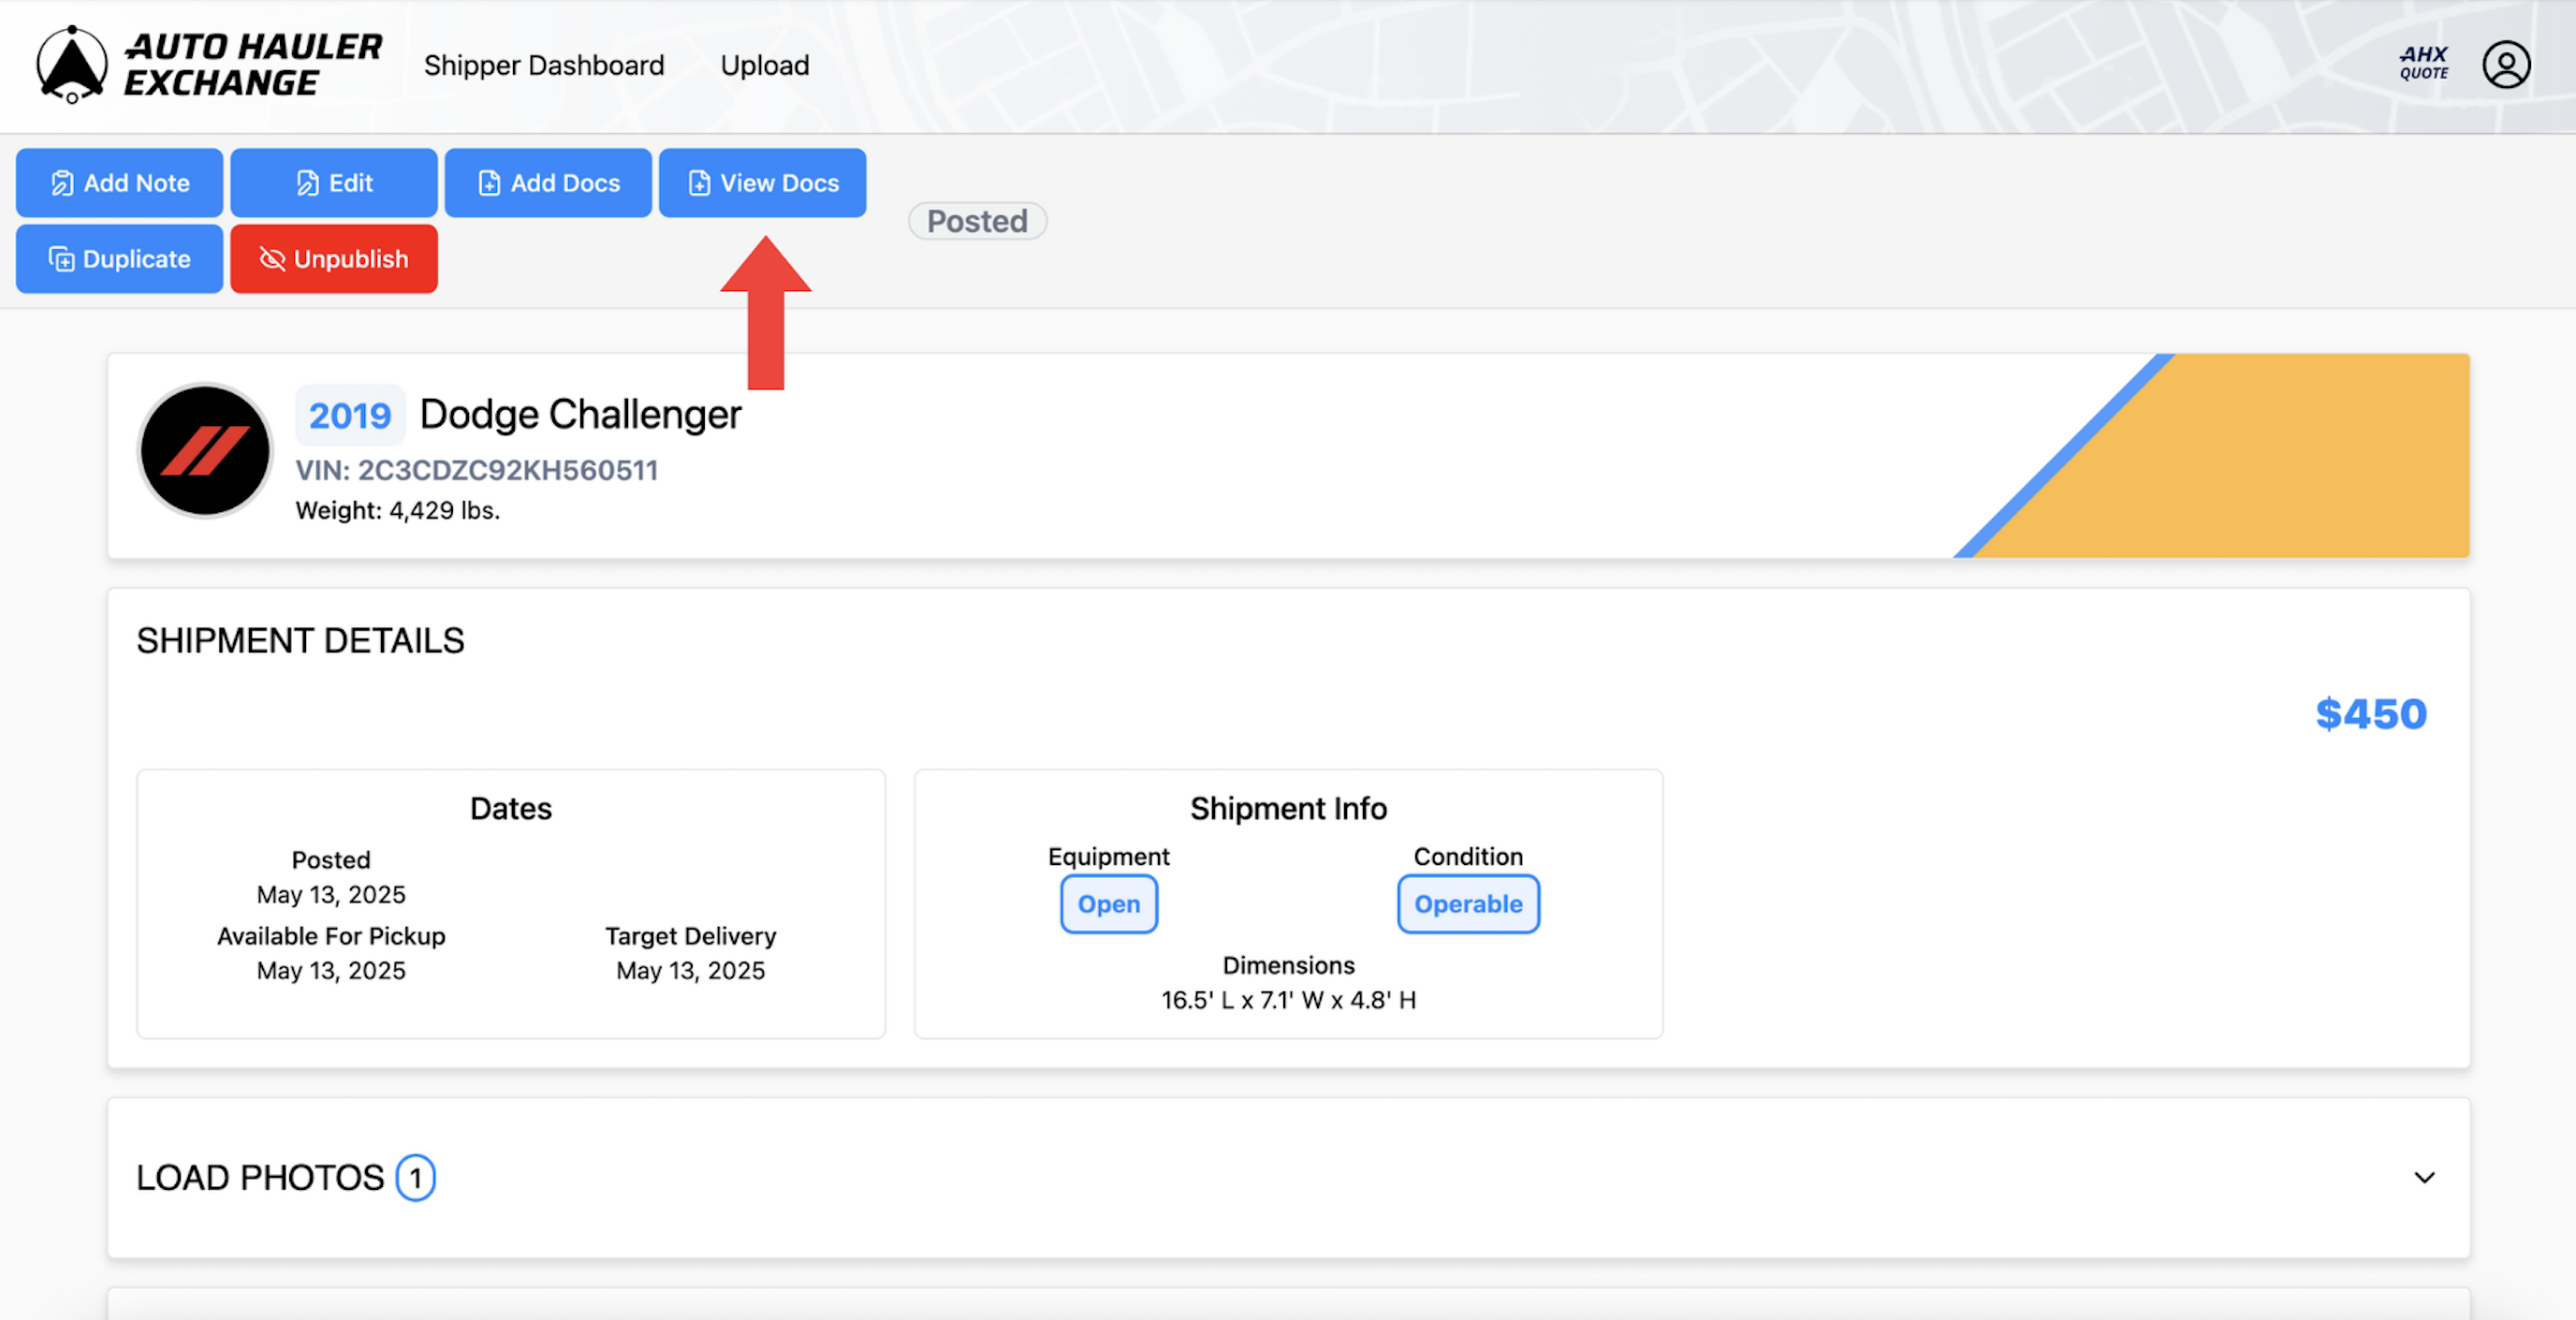
Here you will be able to view each individual document that you have uploaded under that load the same way we presented to you in the previous step.
Need assistance? Don’t hesitate to reach out — we’re always here to help!


.png)
